Ever heard of the saying, “If you don’t move out of your comfort zone, you’re never going to grow?” Well, the same can be said for some plants. Moving plants from point A to point B is known as transplanting, and if you’re an avid gardener or planning to become one, you’re going to be doing a lot of it. In this blog, we’re going to equip you with all the tips and tricks on properly transplanting your greens so that you can continue to grow your garden and produce fresh crops all year round. Now, let’s get digging!
What is Transplanting, and Why Should We Do It?
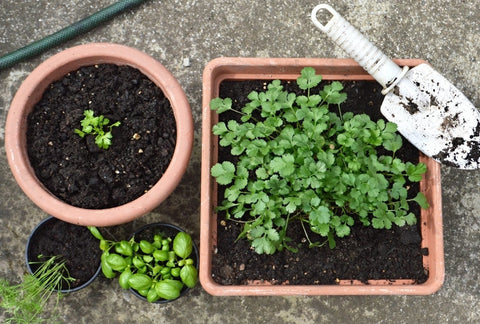
Transplanting is when we move seedlings from their pots into the garden soil or a bigger container. If you’re someone who prefers purchasing seedlings or “transplants” from a garden center, then transplanting is an essential skill to master. The same goes for those of you who like to start your seeds indoors. We transplant seedlings because we want to give them enough space to grow and mature. Plants need lots of room to spread their roots, so it wouldn’t make sense to keep them in a tiny container forever – otherwise, they would die from not getting enough nourishment. If you have an overcrowded garden, your plants will stop producing because they are fighting for nutrients. But, you can save the day by transplanting your plants to a new location.
Can You Transplant All Your Plants?
Not all plants are fit to transplant – this is especially true for taproots such as carrots, beets, radishes, and similar crops. Since these root crops grow underground, transplanting them would disturb their growth and damage their roots, so it’s best to start these vegetables from seed and leave them in one place. Squash, cucumbers, melons, eggplants, and beans also don’t transplant well due to their delicate roots. However, you can successfully transplant them with utmost care. Plan a dedicated spot for these plants in your garden.
How to Select Good Plants for Transplant?
If you want to take the quicker route and not start from seeds, we’ll share some tips on how to select suitable transplants when you’re shopping in the garden center.
Look for Short and Bushy Plants
When choosing a seedling, look for short, bushy plants with dark green leaves, which is a good sign of health. Check for strong white roots, but make sure they are not circulating too much of the topsoil, which indicates stress. Don’t pick large plants or those that have already flowered and borne fruit. A young plant with no fruit will have more energy to focus on spreading its roots and adjusting to a new environment, resulting in better yields in the future.
Look Out for Bugs
Ensure that the plant you choose does not have wilted, curled, spotted, or yellowed leaves, as these are indicators of sickness or bug infestations. Always check under the leaves for critters to avoid bringing pests into your garden.
Stay Away From Clearance Sales
Pick plants that will flourish in your climate and region, and avoid clearance sales. Discounted plants are often on sale because they have outlived their stay in their pots and are less likely to survive transplantation.
When and How to Transplant the 7 Most Popular Spring Plants?
Now that you know more about which plants transplant well, let’s dive into the process of transplanting your seedlings. Transplanting can be tricky at first, but it becomes easier with practice.
Get The Timing Right
The timing of transplanting varies for each plant. Cool-season crops should be planted outside before the temperature gets too warm, while warm-season crops will weaken if transplanted too early in the spring. Keep an eye on local weather forecasts and ensure warm-season crops are moved outside only when evening temperatures are consistently above 60°F. Keep track of sowing and transplant dates in a gardening journal to plan efficiently.
Here are suggested times to transplant different spring crops:
Tomatoes
Wait for tomato seedlings to grow at least 4-5 inches before transplanting them outdoors, ensuring the temperature is at least 60°F. Some gardeners suggest transplanting tomatoes twice to allow the roots to grow bigger and stronger. In this case, wait until the plant is 10 inches tall before the final transplant.
Peppers
Peppers, like tomatoes, are warm-season crops. Move them outside when temperatures are steady at 60°F. If starting from seed, wait 3-4 weeks or until the third set of true leaves appears before transplanting.
Strawberries
Strawberry seedlings can be transplanted in the spring as long as it’s not too hot. High temperatures can kill strawberries, so transplant them in late August when it’s cooler.
Broccoli
Broccoli is a cool-season crop and can be transplanted outside in early spring or late summer. Seedlings should be ready to transplant when they are 4-6 weeks old with 3-4 true leaves.
Rosemary
Rosemary cuttings are usually ready to be transplanted outside after 8 weeks of propagation. If starting from seed, transplant rosemary when they’re 4-5 inches tall. They can withstand temperatures above 30°F.
Oregano
Oregano can be transplanted at the 4-6 week stage when seedlings have at least 4 true leaves. The soil should be around 70°F, so transplant oregano after the last spring frost.
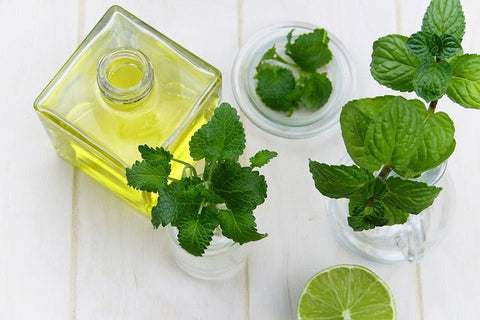
Mint
Mint is easy to grow from seed or cuttings. Transplant mint in a bigger pot when the temperature is around 60°F.
Prep Your Garden and Plants Accordingly
Once you’ve got the timing right, prepare your garden and plants for the move. Hardening off your plants is crucial before transplanting them outdoors. Gradually transition plants that started indoors to outdoor life by bringing them outside in a shady area for a few hours each day, increasing exposure to sun and wind over 7-10 days. Keep the soil moist throughout this period.
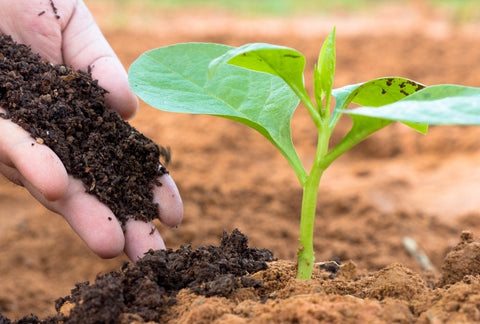
Loosen and aerate the soil before transplanting, adding organic matter to retain moisture. If the soil is too dry, it will draw moisture from the plant’s roots and damage them. Rake the soil to even out the surface and make it less compact.
How to Transplant Plants from Pot to Soil
The best time to transplant seedlings is on a warm, overcast day, early in the morning. This gives the plant time to settle in its new environment without direct sun exposure.
- Dig a hole in your soil about as deep as the seedling’s root ball and a little wider.
- Turn the pot upside down while supporting the soil, and gently tap the bottom to remove the plant.
- Place the seedling in the hole and cover it with soil.
- Lightly press the soil around the seedling to ensure good contact between the plant’s roots and soil.
- Water the soil around the newly transplanted seedling to help settle the roots, eliminate air pockets, and reduce transplant shock.
And voila! You’ve successfully transplanted a seedling outdoors. Watch your plants and ensure they stay healthy. Adding fertilizer a few days after transplanting can help root development.
If you have more questions about transplanting or gardening, join our Private Facebook Group or send us a DM on Instagram. We’d be happy to give you some sage advice!


There are no comments for this article. Be the first one to leave a message!