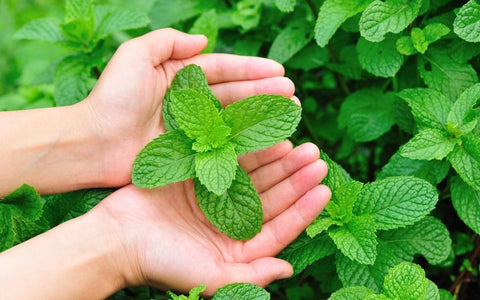
We totally get it! This last summer had all of us thirsty for something refreshing. Mint is known not only for its many benefits to the human body but also for its wonderful taste that’s essential to making refreshing and delicious drinks, watermelon salad, and more. In this blog, we’ll be talking about everything related to growing mint outdoors, from its basic facts, supplies, setup, and steps to grow, care for and harvest it.
|
Plant type |
Perennial |
|
Family |
Lamiaceae |
|
Binomial name |
Mentha |
TimingMint sprouts in 2 weeks and they can be harvested from Month 3+ on. Part sunYour outdoor mint plants need at least an equivalent of 5+ hours of direct sun [DLI of 15+ mol/m²/day] to grow successfully. CareGrowing mint plants outdoors is very much beginner friendly, but it can involve a few more processes compared to growing them indoors. You’ll sprout, thin, prune, harvest, and maybe try to get rid of pests and other problems from time to time. |
TABLE OF CONTENTS
Ways to Grow Mint | Care and Maintenance for Cilantro | Timeline & Steps
Ways to Grow Mint Outdoors
Growing Mint Outdoors Using Soil
Mint plants, in general, do well in moist soil conditions. If the soil dries out completely the roots will die back, and it will be tough for the plant to recover. On the other hand, if the roots are exposed to standing water for too long, they can rot.
You have two options to choose from when growing mint outdoors:
- plant directly onto soil, or
- use a container - with drainage!
If you prefer planting directly onto soil, you can use potting mixes you can buy from stores or online, or you can also create your own. In this blog, we explained how to create your own potting mix. Just remember that herbs such as mint thrive more in nutrient-dense soils, so if you don’t have that, you can also look into incorporating plant foods or fertilizers.
We prefer using containers as we have more control over the growth of herbs by using this method. Mint tends to grow aggressively and take over the whole space of garden beds or soil sites. Take note that if you opt for containers, they should have good drainage as herbs such as mint thrive well in this kind of environment.
If you’re not sure what size of pot or container to use for your herbs, check this out.
You can also see the table comparison below about the pros and cons of soil and containers:
|
Pros |
Cons |
|
|
Soil |
|
|
|
Container |
|
|
Other Ways to Grow Mint Outdoors
You can also use ollas (plant watering spikes/globes) for your containers to help with drainage. Raised beds are a good choice for growing herbs such as mint outdoors, too.
Best Gardening Zones for Growing Mint Outdoors
As mint loves moist and nutrient-dense soil with a neutral pH, the best gardening zones for them to grow on would be zones 3-8. If you’re not living in any of these zones, then we suggest you grow your herbs indoors instead.
To know more about growing mint indoors, check this out.
Care and Maintenance of Mint Plants Outdoors
Light Requirements for Growing Mint Outdoors
Like all edible plants, Mint plants need lots of light to grow and develop good flavor. Sunlight is excellent for plant growth (and free!) and you might be lucky enough to have a spot that’s got the 5+ hours of direct sun they need.
Right Temperature for Your Outdoor Mint Plant
Extend your harvest by keeping the Temperatures Cool
The mint plant is known as a “cool weather crop.” If it senses warming temperatures it will “bolt” - send up flowers and become bitter in the process. Where you plant them can have some effect on the temperature. It's best to avoid spaces that can get really hot.
Water and Humidity
Herbs such as mint thrive on consistent moisture but can suffer if they’re waterlogged, so make sure to water them regularly especially if you’re using soil. To avoid your outdoor mint plant being waterlogged, make sure to use a pot with drainage, or just use ollas (self-watering globes/spikes), or raised beds.
Nutrients and Fertilizers
Mint likes to start with nutrients that are equal parts nitrogen, phosphorus, and
potassium (with NPK numbers like 10-10-10). For this Balanced Blend we recommend: Dr Earth All
Purpose
Once they are growing, it’s better to use plant food
that is high in nitrogen (with NPK numbers like 10-5-5). For this Herb Blend, we recommend: Joyful Dirt All Purpose
When to Move Your Mint Plant Indoors
We talked about mint plants liking cooler temperatures, so we suggest moving them indoors a few weeks after the first frost. To learn more about growing mint indoors, check this out.
Common Problems with Growing Mint Plants Outdoors
Pests
As you’ll be growing your mint outdoors, you need to keep in mind that you might encounter pests such as mint root borers, spider mites, aphids, and cutworms.
The solution to aphids and other soft-bodied pests is a block of insecticidal soap. You can also use a natural product called azadiractin, which can be effective to all the other pests we mentioned. To learn more about pests and how to get rid of them, click here.
Diseases
Growing plants outdoors or indoors can also risk your plants to certain diseases, such as leaf spots, mildew, wilting, mold, and mint rust. Click the above link to learn more about preventing these diseases.
Timeline and Steps on How to Grow Mint Outdoors
Best Setup for Outdoor Mint
Below is the best setup (and a very easy one!) for growing your mint plants outdoors. You’ll need:
Best Planter for Mint:
You can use a planter with good drainage or if you don’t have one, you can also use ollas together with your planters, or you can opt for raised garden beds.
Soil:
Standard Potting Mix
Plant Food:
At the start: Balanced Blend. This should be equal parts nitrogen, phosphorus, and potassium (with NPK numbers like 10-10-10).
Ongoing: Herb Blend. This should be high in nitrogen (with NPK numbers like 10-5-5).
Starting your Mint: Seed vs Cutting vs Nursery Plant
New mint plants can be started from seed, propagated from an established plant, or purchased live at many garden centers. We prefer to sprout from seed or propagate from a stem cutting, as it results in plants that are adapted to your growing conditions and limit the chances that you accidentally bring home pests.
How to Plant Mint Seeds

Mint grows quickly from seed. Plant 1 site in an 8" / 1 gal container. In larger containers, space sites 4" apart. For each site press 3 seeds into the surface. Keep the soil warm ( 68-80°F, ideally 70°F). Sprouts typically appear in 12 days but can be as quick as 10 days or as long as 15 days depending on your conditions. Don't cover the seeds as light helps them sprout. .
How to Transplant Mint
![]()
Live starter plants give you a big jump start on your first harvest. When you’re in a garden center - pick the bushiest plant available (tall and lanky ones will be weak growers) and give it a good inspection for pests.
Leaves should be dark green without holes, spots, or curled edges. A best practice is to actually “quarantine” your plant for about a week after bringing it home to make sure it's free and clear of ride-on pests.
Ensuring its pest and disease-free it’s time to transplant your seedling into its final home.
- Remove some soil from its final planter - leaving enough space for the bottom of the seedling to be just higher than the soil surface.
- Hold on to the base of the stem with one hand and turn the pot over while gently pulling the seedling. Giving the pot a few squeezes can help dislodge it.
- Place in its final container and fill around it with soil so that it’s tight, but not compacted.
Week 2: Check for Mint Sprouts
You could see seedlings in as little as 10 days (though 12 days is more typical). If it’s been 15 days and you still don’t have any sprouts, it’s likely that your setup is too cold.
Week 4: Thin Your Mint Seedlings

Thin your planter to only have 1 seedling per site - leaving the largest plant. If you are using the recommended planter (at least 8" / 1 gal) this will mean you’ve got 1 plant after thinning. By getting rid of the smaller seedlings, you’re allowing the biggest and strongest one to flourish by reducing its competition for water, food, and space.
If your seedlings are under 1 inch, stretching out, or folding over, it’s likely that they don't have quite enough light.
Month 2: How to Prune Mint Plants

Once your Mint plant has 3 sets of mature leaves, you’re ready for your prune. Cut off the top set of mature leaves,
leaving the bottom two (it’s best to cut right above the pair of leaves you’re keeping on the plant). Once these
branches grow out (and each has a few sets of their own leaves) you can cut the tip - just as you did with the main
stem.
At this point your plant will be fairly well shaped, so hone your inner Bonzi master and use your
thinning and heading cuts to harvest and shape your herbs as you go.
Month 3+: How to Harvest Your Outdoor Mint Plant
As your outdoor mint continues to grow, keep harvesting to encourage growth. If you only want a couple of leaves, pick leaves where new ones are emerging at the base. For a bigger harvest, cut one of the stems directly harvest, cut off the stems directly. You shouldn't harvest more than 1⁄3 of the plant at a time.
How to Use Your Freshly-harvested Mint Leaves in Cooking
Mint is an herb with a very fresh flavor, which can be added to your sweet and refreshing drinks and to your savory dishes. Here are just some ways they can be used in cooking:
- Mint tea
- Top on/mix with pasta
- Make pesto
- Add to cocktails
- Mix with salads
Check out some more of our favorite mint recipes here.
How to Preserve Mint Leaves
There are several ways to preserve or keep your herbs fresh, and here are just some of the easiest and the ones we recommend the most:
- Lazy person technique. It involves keeping the fresh herbs in their original packaging and simply storing them in the fridge.
- Storing the herbs in a glass of water inside the fridge. You can do this by cutting the end of the stem of your herb, filling a glass jar or cup with water, and placing your herb inside. Almost like a vase or bouquet of herbs!
- Keep in a glass of water under natural lighting.
- Wrap loosely in a damp paper towel.
- Freeze them herbs! Yes, you can freeze fresh herbs such as mint to use at a later time! All you need are some ice cube trays and a freezer, and you’re all set.
Learn more about how to preserve and keep your herbs and mint fresh here.
Year 10+: End of Life
Mint, being a perennial herb, can live for a very very long time if the conditions are right. If you live somewhere with colder winters and are growing outside, be sure to bring your mint in before the temperatures drop or after a few weeks after the first frost.
If you’d like to learn about the dozens of other herbs, fruits, and vegetables that you can grow outdoors then grab a copy of our free eBook below.
We hope that this blog has given you everything you need to know about growing mint outdoors. In case you have any questions, just leave a comment below.


There are no comments for this article. Be the first one to leave a message!