Whether you’re growing using traditional techniques in soil, or hydroponically with one of our bottle garden kits, creating the right environment for the ‘root zone’ of your plants is critical to their long-term health. This article provides some tips on selecting the perfect bottle for your bottle garden kit.
Selecting The Right SIZE Bottle For Your Bottle Garden Kit
While your bottle garden kit can be set up in most bottle sizes, it’s going to work best in a 750ml bottle – such as a wine bottle. Why? The special smart soil that comes with your kit has been enriched with plant nutrients (plant food) that have been customized for a 750ml reservoir (bottle) size.

While a smaller bottle such as a 12oz beer bottle will work okay, it means that the plant nutrients are going to be ~2x stronger than they need to be, plus it also means that down the road you’re going to be refilling your reservoir (bottle) ~2x more often. We wanted to make this easy for you, hence we designed the product to work with a bigger bottle.
The Right COLOR Bottle For Your Bottle Garden
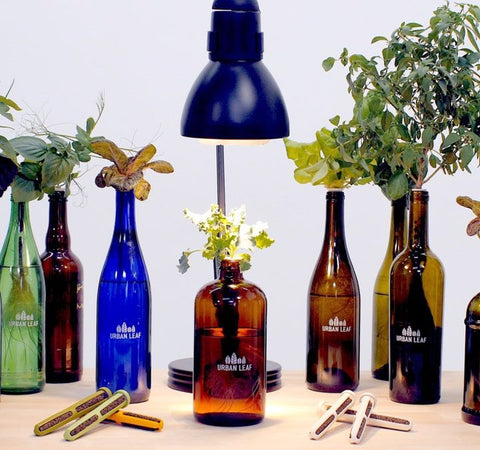
We recommend using a dark green or brown bottle to set up your garden. The reason for this is that green in particular does a good job of blocking the red and blue frequencies of light. Why does this matter? Red and blue frequencies are what plants (and algae) rely on for photosynthesis. Basically, if you want clean water you need to block red/blue light from getting in. Although clear bottles look cool, they are far more vulnerable to algae growth in the water. As well as not looking very nice, this algae is going to consume nutrients that would otherwise be available for your plant. The ‘root zone’ of most plants prefer not to be exposed to too much light.
“But I really really want to use this fancy clear bottle because I love the shape!” That’s great! Why not consider making a craft project out of it by painting the bottle and decorating it? Not only will this look cool, but the decoration will also help block the light! (pro tip: apply a strip of tape along one side before you start. When done, remove the tape to leave yourself a clear strip so you can still check the water level)
Here’s some inspiration we’ve collected for you on Pinterest.
What Is The Best MATERIAL For Your Bottle Garden Bottles?
The size and color requirements above lead most people to using red wine bottles – which we’ve generally found work well. For some people, glass is a bit of a concern, particularly if you have pets or children.
We like using glass bottles because there’s less concern about nasties leaching into the water and hence our food, as is the case with some plastics. Plastic bottles will work fine – as long as points #1 and #2 above are met. Just make sure you check the material (there are many different types of plastics) and ensure it’s safe.
In case you were wondering about our product itself: it’s made from a material called PLA, which is a corn starch-based plastic. This material is FDA approved, food safe, and biodegradable. It costs us a bit extra to use a biodegradable material like this, but we feel it’s money well spent.
Do The Prior CONTENTS Of The Bottle Matter?
Former beverage bottles are best because they are least likely to leave residue in the bottle. While they can look really cool, one of the things we’ve discovered in testing olive oil bottles is that they are really hard to get clean – and the oil residue in the bottle can cause a fungus on the plant roots.
If you’re going to use a bottle that formerly contained a food substance, we recommend first washing out the bottle with warm soapy water, then washing again with a small amount of household bleach, before a final rinse with fresh water. This will get the bottle as clean as possible.
What SHAPE Is Best For Your Bottle Garden Kit?
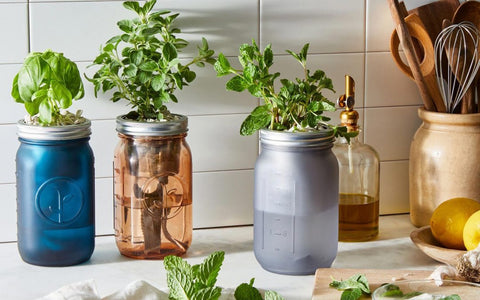
Pretty much any bottle shape will work. We designed our Window Sill Garden inserts to be long enough that they can wick (using a capillary action) water up from the reservoir (bottle) for at least a couple of weeks while the seeds are getting started.
A dark green-colored former red wine bottle is perfect in pretty much every way – and if you have one, use it. The only minor adjustment we’d make to the bottle (if we could) would be to use something with a slightly shorter neck – like the kombucha bottles pictured below (thanks @thefrenchkoala and @jaydenkahl for the pic!)

“Eek! I used the wrong bottle!”
No problems! It’s easy to switch bottles. Just prepare the new bottle, carefully remove the insert, transfer the water to your new bottle (this bit is super important – don’t use new water as it will be missing the nutrients), then pop the insert into the new bottle.
So there you go! Hopefully, these tips help you set up your new indoor herb garden by making sure you have the right bottle. Have fun with it – and we’d love to see the creative things you’re able to do with an item that would have otherwise been thrown away. Make sure to tag us on social media (@GetUrbanLeaf) when showing off your handy work!
If you’d like to learn more about Indoor Edible Gardening, signing up for our email list below will mean you get regular updates, tips, and tricks on how to get the most out of your garden.

There are no comments for this article. Be the first one to leave a message!